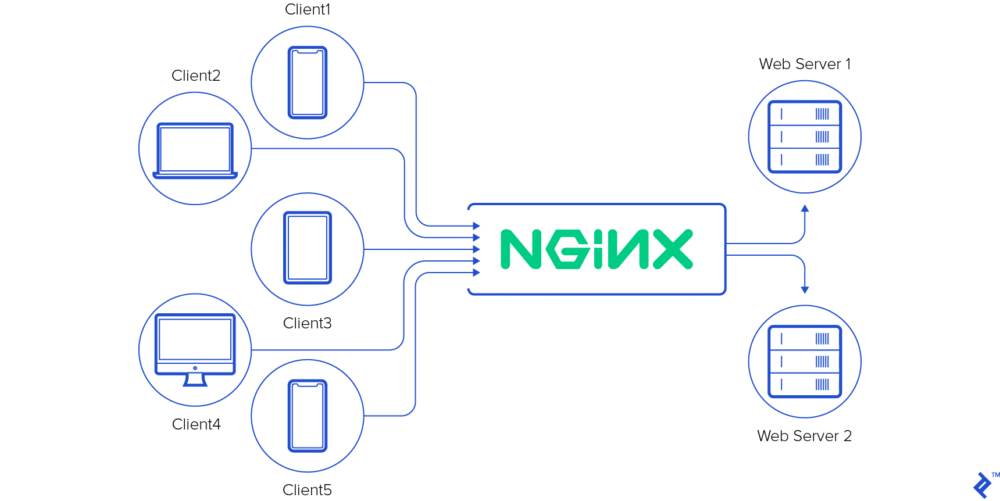
NGINX powers over 34% of all active websites globally, including some of the world’s highest-traffic platforms. It functions as a web server, reverse proxy, load balancer, API gateway, and TLS termination point — often all at once. That versatility comes with a critical consequence: a misconfigured NGINX instance is one of the most exploited entry points in modern infrastructure.
This guide moves beyond the basic CIS Benchmark checklist format. Each control includes the specific configuration code, the real-world attack it prevents, and how it integrates with complementary security tools — WAF, CDN, SIEM, and DDoS mitigation. Whether you’re securing a single VPS running a Laravel application or hardening NGINX across a distributed Kubernetes cluster, this is your complete operational reference.
Why NGINX Hardening Is a Business Priority — Not Just an IT Task
Before diving into configuration, consider what an unhardened NGINX instance actually costs.
A misconfigured NGINX server running with default settings exposes your organization to: information disclosure attacks that reveal your software version and backend topology to automated scanners; TLS downgrade attacks that decrypt traffic between clients and your server; host header injection that allows attackers to route requests to unintended backend systems; and DDoS amplification at the application layer, which is far harder to mitigate than volumetric attacks.
The financial stakes are significant. The average cost of a web application data breach reached $4.88 million in 2024 (IBM). PCI DSS fines for inadequate web server security range from $5,000 to $100,000 per month. Major organizations are facing eight-figure GDPR penalties due to preventable data exposure.
NGINX hardening — done properly and automated through configuration management — eliminates the most common exploitation paths for under an hour of implementation time per server.
Section 1: Installation and Update Management
1.1 — Install NGINX from Official Repositories Only
Severity: Medium | CIS Control: 1.1.1
Never install NGINX from an unofficial or untrusted package source. Attackers have distributed trojanized NGINX packages through third-party repositories that include backdoors and credential-harvesting modules.
For Debian/Ubuntu, configure the official NGINX repository:
curl https://nginx.org/keys/nginx_signing.key | gpg --dearmor \
    | sudo tee /usr/share/keyrings/nginx-archive-keyring.gpg >/dev/null

echo "deb [signed-by=/usr/share/keyrings/nginx-archive-keyring.gpg] \
http://nginx.org/packages/ubuntu $(lsb_release -cs) nginx" \
    | sudo tee /etc/apt/sources.list.d/nginx.list

sudo apt update && sudo apt install nginx
For RHEL/CentOS/Rocky Linux:
sudo dnf install https://nginx.org/packages/centos/8/x86_64/RPMS/nginx-1.26.0-1.el8.ngx.x86_64.rpmSecurity rationale: Supply chain attacks targeting web server packages are actively occurring. Using signed packages from the official NGINX repository with GPG verification ensures you are running authentic, unmodified software.
1.2 — Configure Automatic Security Updates
Severity: Medium | CIS Control: 1.2.1 / 1.2.2
Unpatched NGINX versions are actively scanned and exploited. CVE-2025-0108 (path confusion bypass) and several HTTP/3 implementation vulnerabilities in recent NGINX releases were weaponized within days of public disclosure.
On Debian/Ubuntu:
sudo apt install unattended-upgrades
sudo dpkg-reconfigure --priority=low unattended-upgrades
Verify your current version and compare against the latest stable release on nginx.org:
nginx -v
# Expected output: nginx version: nginx/1.26.x or higher
Operational note: Test NGINX updates in a staging environment before deploying to production. Major version upgrades sometimes change default behavior for proxy_pass, SSL session handling, or HTTP/2 settings. Maintain a rollback procedure — keep the previous package cached locally.
Section 2: Core Configuration Hardening
2.1 — Load Only Required Modules
Severity: High | CIS Control: 2.1.1
NGINX’s dynamic module system allows unnecessary functionality to be completely removed from the running process. Every loaded module is an additional attack surface and memory allocation target.
Check currently loaded modules:
nginx -V 2>&1 | tr ' ' '\n' | grep moduleIn your nginx.conf, load only modules your application actively uses:
# Load only what you need — comment out everything else
# load_module modules/ngx_http_geoip_module.so;
load_module modules/ngx_http_ssl_module.so;
load_module modules/ngx_stream_module.so;
# load_module modules/ngx_mail_module.so;  # Disable if not running mail proxy
Modules that should be disabled for most web server deployments: ngx_http_autoindex_module (directory listing), ngx_http_ssi_module (server-side includes), ngx_http_geo_module (unless doing geo-IP filtering), and ngx_http_scgi_module (unless using SCGI backends).
Security rationale: Each loaded module increases the attack surface. The
ngx_http_autoindex_moduleenabled withautoindex onhas been responsible for numerous sensitive file exposure incidents. Unused modules provide no benefit and only add risk.
2.2 — Run NGINX as a Dedicated Non-Privileged Service Account
Severity: Critical | CIS Control: 2.2.1 / 2.2.2 / 2.2.3
This is one of the highest-impact controls in this entire guide. If an attacker achieves remote code execution through a vulnerability in your application, the damage they can cause is directly bound by the privileges of the NGINX process.
Create a dedicated service account with no shell access and no login capability:
sudo useradd --system --no-create-home --shell /usr/sbin/nologin --user-group nginxLock the account to prevent it from ever being used for interactive login:
sudo passwd -l nginx
sudo usermod -s /sbin/nologin nginx
Verify the account configuration:
grep nginx /etc/passwd
# Expected: nginx:x:998:998::/home/nginx:/sbin/nologin

sudo passwd -S nginx
# Expected: nginx L (locked)
In nginx.conf:
user nginx;
worker_processes auto;
Security rationale: NGINX requires root to bind ports below 1024 (like 80 and 443), but the master process immediately drops privileges to the
nginxuser for worker processes. A process running asrootthat gets exploited gives an attacker full system control. A process running asnginxwith a locked, shell-less account significantly limits post-exploitation capability.
2.3 — Restrict File and Directory Permissions
Severity: Medium | CIS Control: 2.3.1 / 2.3.2 / 2.3.3
NGINX configuration files and private keys must be owned by root and inaccessible to the service account itself. This prevents a compromised NGINX worker from reading or modifying its own configuration.
# Set correct ownership
sudo chown -R root:root /etc/nginx/
sudo chown root:root /var/log/nginx/

# Set restrictive permissions
sudo chmod -R 755 /etc/nginx/
sudo chmod 640 /etc/nginx/nginx.conf
sudo chmod 600 /etc/nginx/ssl/*.key  # TLS private keys: root only

# Secure PID file
sudo chmod 644 /var/run/nginx.pid
sudo chown root:root /var/run/nginx.pid
Audit permissions regularly:
find /etc/nginx -type f -perm /o+w -ls  # Find world-writable files (should return nothing)
find /etc/nginx -name "*.key" -not -perm 600  # Find insecure private keys
2.4 — Network Configuration and Timeout Hardening
Severity: Medium | CIS Control: 2.4.1 / 2.4.2 / 2.4.3 / 2.4.4
Connection timeout misconfigurations are a primary vector for Slowloris-style DoS attacks, which hold open HTTP connections by sending data extremely slowly, exhausting NGINX’s connection pool.
Add the following to the http {} block in nginx.conf:
http {
    # Only listen on authorized ports — document any exceptions
    # listen 80;
    # listen 443 ssl;

    # Reject requests for unknown virtual host names (prevents host header attacks)
    server {
        listen 80 default_server;
        listen 443 ssl default_server;
        server_name _;
        return 444;  # Closes connection without response
    }

    # Timeout hardening — prevents Slowloris and slow POST attacks
    keepalive_timeout 10;        # CIS: 10 seconds or less
    send_timeout 10;             # CIS: 10 seconds or less
    client_header_timeout 10;
    client_body_timeout 10;
    reset_timedout_connection on;

    # Connection limits
    keepalive_requests 100;
}
Security rationale: The default
keepalive_timeoutin NGINX is 75 seconds — far too long for public-facing services. An attacker running a Slowloris attack with default timeouts can exhaust NGINX’s worker connections with a very small number of slow requests, causing a full denial of service. Setting timeouts to 10 seconds defeats this attack class while remaining imperceptible to legitimate users.
2.5 — Disable Information Disclosure
Severity: Medium | CIS Control: 2.5.1 / 2.5.2 / 2.5.3 / 2.5.4
Every piece of server version information you expose reduces the cost of targeted exploitation. Attackers use NGINX version information to look up known CVEs and run automated exploits.
http {
    # Hide NGINX version from Server header and error pages
    server_tokens off;
# Hide backend server details when using reverse proxy
proxy_hide_header X-Powered-By;
proxy_hide_header X-AspNet-Version;
proxy_hide_header X-AspNetMvc-Version;
proxy_hide_header Server;
# Replace server header entirely (requires NGINX Plus or headers-more module)
# more_set_headers 'Server: webserver';
server {
# Block access to hidden files (.htaccess, .git, .env, etc.)
location ~ /\. {
deny all;
return 404;
access_log off;
log_not_found off;
}
# Block access to common sensitive files
location ~* \.(sql|bak|log|conf|env|yaml|yml|json)$ {
deny all;
return 404;
}
}
}Replace default NGINX error pages to remove version references:
# Custom 404 page with no NGINX branding
echo '<html><body><h1>404 Not Found</h1></body></html>' > /var/www/html/404.html
Attack scenario: Automated scanners like Shodan, Censys, and ZoomEye continuously index server headers. A server broadcasting
Server: nginx/1.18.0is immediately identifiable as a target for all known CVEs against that version.server_tokens offremoves this information with zero performance cost.
Section 3: Logging, Monitoring, and SIEM Integration
3.1 / 3.2 / 3.3 — Enable Comprehensive Logging
Severity: High | CIS Control: 3.1 / 3.2 / 3.3
Without adequate logging, security incidents are invisible until they produce measurable damage. NGINX’s access and error logs are the primary data source for detecting attacks, investigating incidents, and satisfying compliance requirements under PCI DSS (Requirement 10), HIPAA, and GDPR.
Configure a structured log format that includes all security-relevant fields:
http {
    log_format security_detailed '$remote_addr - $remote_user [$time_local] '
        '"$request" $status $body_bytes_sent '
        '"$http_referer" "$http_user_agent" '
        '$request_time $upstream_response_time '
        '"$http_x_forwarded_for" '
        '$ssl_protocol $ssl_cipher';

    access_log /var/log/nginx/access.log security_detailed;
    error_log /var/log/nginx/error.log info;

    # Enable logging of 4xx and 5xx errors separately for alerting
    map $status $loggable {
        ~^[45] 1;
        default 0;
    }

    access_log /var/log/nginx/error_requests.log security_detailed if=$loggable;
}
3.4 — Forward Real Client IPs Through Proxy Chains
Severity: Medium | CIS Control: 3.4
When NGINX sits behind a CDN (Cloudflare, AWS CloudFront, Fastly) or load balancer, the $remote_addr variable contains the proxy’s IP rather than the real client’s. This breaks rate limiting, geo-blocking, access control rules, and forensic investigation.
http {
    # Trust headers from known proxy IP ranges
    set_real_ip_from 103.21.244.0/22;   # Cloudflare
    set_real_ip_from 103.22.200.0/22;   # Cloudflare
    set_real_ip_from 103.31.4.0/22;     # Cloudflare
    set_real_ip_from 141.101.64.0/18;   # Cloudflare
    set_real_ip_from 108.162.192.0/18;  # Cloudflare
    set_real_ip_from 190.93.240.0/20;   # Cloudflare
    # Add your load balancer IPs here

    real_ip_header X-Forwarded-For;
    real_ip_recursive on;
}
SIEM Integration: Forward NGINX logs to your SIEM in real time using a log shipper:
# Filebeat configuration for NGINX log ingestion to Elastic/Splunk/QRadar
# /etc/filebeat/filebeat.yml

filebeat.inputs:
  - type: log
    paths:
      - /var/log/nginx/access.log
      - /var/log/nginx/error.log
    fields:
      service: nginx
      environment: production
    fields_under_root: true
For Wazuh users (referenced in the original CIS documentation), NGINX log monitoring rules are built-in under the 0245-nginx_rules.xml ruleset. Enable the NGINX decoder and configure alerts for HTTP 400 flood patterns and authentication bypass attempts.
Compliance note: PCI DSS Requirement 10 mandates that audit logs capture all access to cardholder data, all actions by privileged users, and all invalid access attempts. NGINX access logs, properly configured and forwarded to a SIEM, satisfy this requirement for web tier access.
Section 4: TLS/SSL Configuration — The Complete Production Standard
4.1.1 — Force HTTPS with Permanent Redirects
Severity: Medium | CIS Control: 4.1.1
HTTP traffic is plaintext. Every request made over HTTP — including login credentials, session tokens, and sensitive form data — can be intercepted by any network observer. Redirect all HTTP traffic to HTTPS permanently:
server {
    listen 80;
    listen [::]:80;
    server_name example.com www.example.com;

    # 301 permanent redirect — cached by browsers and search engines
    return 301 https://$host$request_uri;
}
4.1.2 — Install a Trusted Certificate with Full Chain
Severity: Medium | CIS Control: 4.1.2
A certificate without the full chain causes validation failures on some clients and breaks OCSP stapling. Always include the full certificate chain:
server {
    ssl_certificate /etc/nginx/ssl/fullchain.pem;      # Cert + intermediates
    ssl_certificate_key /etc/nginx/ssl/privkey.pem;    # Private key
    ssl_trusted_certificate /etc/nginx/ssl/chain.pem;  # For OCSP stapling
}
For automated certificate management with Let’s Encrypt (free, trusted by all major browsers):
sudo apt install certbot python3-certbot-nginx
sudo certbot --nginx -d example.com -d www.example.com
# Auto-renewal is configured automatically via systemd timer
4.1.3 — Restrict Private Key Permissions
Severity: High | CIS Control: 4.1.3
Your TLS private key is the single most sensitive file on your server. If it is stolen, an attacker can decrypt all past and future HTTPS traffic, impersonate your server, and invalidate your SSL certificate. Restrict root access only:
chmod 600 /etc/nginx/ssl/*.key
chmod 600 /etc/nginx/ssl/privkey.pem
chown root:root /etc/nginx/ssl/*.key
Verify no unauthorized users can read key files:
ls -la /etc/nginx/ssl/*.key
# Expected: -rw------- 1 root root
4.1.4 / 4.1.5 — Enforce TLS 1.2+ and Disable Weak Ciphers
Severity: Critical | CIS Control: 4.1.4 / 4.1.5
SSLv3, TLS 1.0, and TLS 1.1 have known vulnerabilities: POODLE (SSLv3), BEAST (TLS 1.0), and SWEET32 (3DES cipher). These protocols are deprecated by RFC 8996 and actively exploited. Disable them entirely.
server {
    listen 443 ssl;

    # TLS protocol version — 1.2 minimum, 1.3 preferred
    ssl_protocols TLSv1.2 TLSv1.3;

    # Strong cipher suites — ECDHE for forward secrecy, GCM for AEAD
    ssl_ciphers 'ECDHE-ECDSA-AES256-GCM-SHA384:ECDHE-RSA-AES256-GCM-SHA384:ECDHE-ECDSA-CHACHA20-POLY1305:ECDHE-RSA-CHACHA20-POLY1305:ECDHE-ECDSA-AES128-GCM-SHA256:ECDHE-RSA-AES128-GCM-SHA256';

    # Let client choose cipher (TLS 1.3 ignores this)
    ssl_prefer_server_ciphers off;

    # DH parameters for TLS 1.2 key exchange
    ssl_dhparam /etc/nginx/ssl/dhparam.pem;
}
Generate strong Diffie-Hellman parameters (run once, takes 2–5 minutes):
openssl dhparam -out /etc/nginx/ssl/dhparam.pem 4096Compliance impact: PCI DSS 4.0 (effective March 2025) explicitly prohibits TLS 1.0 and TLS 1.1 for cardholder data environments. Using TLS 1.2 minimum with strong cipher suites is a mandatory PCI DSS control. HIPAA and SOC 2 auditors also verify TLS configuration as a primary technical safeguard.
Validate your TLS configuration against industry benchmarks after deployment:
# Free SSL/TLS test by Qualys SSL Labs (targets A+ rating)
curl https://api.ssllabs.com/api/v3/analyze?host=example.com
4.1.6 — TLS 1.3 and Diffie-Hellman Parameters
Severity: Critical | CIS Control: 4.1.6
TLS 1.3 uses ephemeral Diffie-Hellman key exchange by default, providing perfect forward secrecy on every connection. Unlike TLS 1.2, TLS 1.3 eliminates the static DH parameter file requirement — the ssl_dhparam directive is ignored for TLS 1.3 connections. Your DH parameters only apply to TLS 1.2 fallback connections.
# TLS 1.3 cipher suites are configured separately
ssl_conf_command Ciphersuites TLS_AES_256_GCM_SHA384:TLS_CHACHA20_POLY1305_SHA256:TLS_AES_128_GCM_SHA256;
4.1.7 — Enable OCSP Stapling
Severity: Medium | CIS Control: 4.1.7
Without OCSP stapling, every TLS handshake requires the client’s browser to make a separate HTTP request to the Certificate Authority to check whether your certificate has been revoked. This adds 50–300ms of latency to every new connection, leaks your users’ browsing activity to the CA, and creates a privacy risk. OCSP stapling caches the revocation check on your server.
server {
    ssl_stapling on;
    ssl_stapling_verify on;
    ssl_trusted_certificate /etc/nginx/ssl/chain.pem;

    # DNS resolver for OCSP validation (use your preferred resolver)
    resolver 1.1.1.1 8.8.8.8 valid=300s;
    resolver_timeout 5s;
}
Verify OCSP stapling is working:
openssl s_client -connect example.com:443 -status 2>&1 | grep -A 10 "OCSP Response"
# Look for: OCSP Response Status: successful (0x0)
4.1.8 — Enable HTTP Strict Transport Security (HSTS)
Severity: Medium | CIS Control: 4.1.8
HSTS instructs browsers to only connect to your domain over HTTPS — ever. It defeats SSL stripping attacks, where an attacker on the network intercepts an HTTP request before it can be redirected to HTTPS. Once a browser has received an HSTS header, it will refuse to connect to your domain over HTTP for the duration of the max-age value.
server {
    # Start with a short max-age for testing, then increase to 31536000 (1 year)
    add_header Strict-Transport-Security "max-age=31536000; includeSubDomains; preload" always;
}
After confirming everything works with a shorter max-age, submit your domain to the HSTS preload list at hstspreload.org. Preloaded domains are hardcoded into Chrome, Firefox, Safari, and Edge — protecting users even on their first visit, before they have received the HSTS header.
Warning: HSTS with
includeSubDomainsapplies to all subdomains. Ensure every subdomain (including development and staging environments) serves valid HTTPS before enabling this header, or you will break those environments for all users who have previously visited.
4.1.9 / 4.1.10 — Mutual TLS for Upstream Authentication
Severity: Medium | CIS Control: 4.1.9 / 4.1.10
When NGINX proxies requests to backend services (application servers, microservices, internal APIs), the connection between NGINX and the backend is often unencrypted and unauthenticated. An attacker who gains access to your internal network can directly query your backend, bypassing all NGINX security controls.
Mutual TLS (mTLS) requires both sides to present certificates, ensuring only your NGINX instance can communicate with your backend:
location /api/ {
    proxy_pass https://backend-service;

    # Client certificate NGINX presents to the backend
    proxy_ssl_certificate /etc/nginx/ssl/client.crt;
    proxy_ssl_certificate_key /etc/nginx/ssl/client.key;

    # Verify the backend's certificate
    proxy_ssl_trusted_certificate /etc/nginx/ssl/ca.crt;
    proxy_ssl_verify on;
    proxy_ssl_verify_depth 2;
    proxy_ssl_protocols TLSv1.2 TLSv1.3;

    # Certificate revocation check
    proxy_ssl_session_reuse on;
}
4.1.11 — Secure Session Resumption
Severity: Medium | CIS Control: 4.1.11
TLS session resumption allows clients to reconnect without a full handshake, improving performance. However, session tickets that are too long-lived or that use static keys create a vulnerability: if the ticket encryption key is compromised, past sessions can be decrypted (breaking forward secrecy).
server {
    # Enable session cache for performance
    ssl_session_cache shared:SSL:10m;
    ssl_session_timeout 1d;     # Limit to 1 day maximum

    # Disable session tickets in favor of session IDs
    # (Session tickets require careful key rotation — disable unless needed)
    ssl_session_tickets off;
}
4.1.12 — Enable HTTP/3 (QUIC)
Severity: Medium | CIS Control: 4.1.12
HTTP/3 uses QUIC (UDP-based transport) instead of TCP, providing faster connection establishment, better performance on lossy networks, and built-in TLS 1.3 encryption. It is supported in NGINX 1.25+ and is increasingly expected by modern browsers.
server {
    listen 443 ssl;
    listen 443 quic reuseport;  # HTTP/3 over QUIC

    http2 on;                   # Maintain HTTP/2 as fallback

    # Advertise HTTP/3 support to clients
    add_header Alt-Svc 'h3=":443"; ma=86400';
    add_header Upgrade-Insecure-Requests "1";
}
Section 5: Request Filtering, Rate Limiting, and DDoS Protection
5.1.1 / 5.1.2 — Access Control and HTTP Method Restrictions
Severity: Medium | CIS Control: 5.1.1 / 5.1.2
Most web applications only need GET, POST, and HEAD. Allowing all HTTP methods — including PUT, DELETE, TRACE, and CONNECT — creates unnecessary attack surface for exploitation and is often prohibited by PCI DSS.
server {
    # Restrict sensitive admin endpoints by IP
    location /admin {
        allow 192.168.1.0/24;    # Internal network
        allow 10.0.0.5;          # Specific management IP
        deny all;
    }

    # Allow only required HTTP methods — deny everything else
    if ($request_method !~ ^(GET|HEAD|POST)$) {
        return 405;
    }

    # For API endpoints that need PUT and DELETE, be explicit
    location /api/ {
        if ($request_method !~ ^(GET|POST|PUT|DELETE|PATCH)$) {
            return 405;
        }
    }
}
5.2 — Request Limit Configuration (DDoS and Slowloris Defense)
Severity: Medium | CIS Control: 5.2.1 / 5.2.2 / 5.2.3 / 5.2.4 / 5.2.5
Application-layer DDoS protection is one of the most valuable capabilities NGINX provides. Unlike network-layer DDoS (which requires upstream filtering via CDN or ISP), application-layer DDoS can be mitigated directly in NGINX configuration.
http {
    # Define rate limit zones
    limit_req_zone $binary_remote_addr zone=api:10m rate=10r/s;
    limit_req_zone $binary_remote_addr zone=login:10m rate=1r/s;
    limit_conn_zone $binary_remote_addr zone=connlimit:10m;

    # Request body size limits (prevents large payload attacks)
    client_max_body_size 10m;           # CIS: set appropriate for your app
    client_body_buffer_size 128k;

    # Header size limits (prevents header injection attacks)
    client_header_buffer_size 1k;
    large_client_header_buffers 4 8k;

    # Timeout configuration (Slowloris defense)
    client_header_timeout 10s;
    client_body_timeout 10s;

    server {
        # Apply rate limiting to API endpoints
        location /api/ {
            limit_req zone=api burst=20 nodelay;
            limit_conn connlimit 20;
        }

        # Aggressive rate limiting on authentication endpoints
        location /login {
            limit_req zone=login burst=5 nodelay;
            limit_conn connlimit 5;
        }

        # Return 429 Too Many Requests (more informative than 503)
        limit_req_status 429;
        limit_conn_status 429;
    }
}
Important distinction: NGINX rate limiting provides application-layer protection and is effective against most automated attacks. For volumetric DDoS attacks exceeding your server’s bandwidth capacity, you need upstream protection via a CDN with DDoS mitigation (Cloudflare, AWS Shield, Akamai) or your hosting provider’s DDoS scrubbing service. NGINX and CDN-level protection are complementary, not alternatives.
5.3 — Security Headers (Browser Security Controls)
Severity: Medium | CIS Control: 5.3.1 / 5.3.2 / 5.3.3
HTTP security headers instruct the browser how to handle your content, significantly reducing the attack surface for XSS, clickjacking, MIME sniffing, and information leakage attacks.
server {
    # Prevent MIME type sniffing (XSS via file upload attacks)
    add_header X-Content-Type-Options "nosniff" always;

    # Clickjacking protection
    add_header X-Frame-Options "SAMEORIGIN" always;

    # XSS protection for older browsers
    add_header X-XSS-Protection "1; mode=block" always;

    # Referrer policy — control what URL is sent in Referer header
    add_header Referrer-Policy "strict-origin-when-cross-origin" always;

    # Permissions policy — disable unused browser APIs
    add_header Permissions-Policy "geolocation=(), microphone=(), camera=(), payment=()" always;

    # Content Security Policy — the most powerful XSS protection available
    # Start in report-only mode, then switch to enforced
    add_header Content-Security-Policy-Report-Only "default-src 'self'; script-src 'self' 'nonce-{RANDOM}'; style-src 'self' 'unsafe-inline'; img-src 'self' data: https:; font-src 'self'; connect-src 'self'; report-uri /csp-report" always;

    # HSTS (from Section 4.1.8)
    add_header Strict-Transport-Security "max-age=31536000; includeSubDomains; preload" always;
}
Implementation note: A strict Content Security Policy (CSP) is the most effective defense against XSS attacks available. Deploy it in
Content-Security-Policy-Report-Onlymode first and collect reports to identify legitimate inline scripts, then move to enforcement. Use a nonce-based CSP for maximum effectiveness. CSP violations reported to your CSP reporting endpoint also provide early warning of active XSS exploitation attempts.
Section 6: Web Application Firewall (WAF) Integration
The CIS Benchmarks cover NGINX configuration hardening, but they do not address layer-7 attack filtering. Deploying a WAF alongside hardened NGINX provides the next tier of protection for web applications.
ModSecurity with OWASP Core Rule Set (Free, Open Source)
ModSecurity is the most widely deployed open-source WAF engine, used as the foundation for numerous commercial WAF products. Integrated with NGINX, it filters requests against the OWASP Core Rule Set (CRS) — protecting against SQL injection, XSS, command injection, path traversal, and the full OWASP Top 10.
# Install ModSecurity for NGINX
sudo apt install libmodsecurity3 libmodsecurity-dev
sudo apt install libnginx-mod-http-modsecurity

# Download OWASP Core Rule Set
git clone https://github.com/coreruleset/coreruleset /etc/nginx/modsecurity/coreruleset
cp /etc/nginx/modsecurity/coreruleset/crs-setup.conf.example \
   /etc/nginx/modsecurity/coreruleset/crs-setup.conf
Enable in NGINX configuration:
# nginx.conf — http block
modsecurity on;
modsecurity_rules_file /etc/nginx/modsecurity/modsecurity.conf;
Start in detection-only mode to identify false positives before enforcing:
# /etc/nginx/modsecurity/modsecurity.conf
SecRuleEngine DetectionOnly  # Change to "On" for enforcement
SecAuditLog /var/log/modsecurity/audit.log
SecAuditLogParts ABIJDEFHZ
Commercial WAF Options
For organizations requiring managed rule updates, 24/7 threat intelligence, and dedicated support:
| WAF Solution | Deployment | Starting Price | Key Strength |
|---|---|---|---|
| Cloudflare WAF | Cloud (CDN-integrated) | Free tier; $20/month Pro | Global threat intelligence, DDoS included |
| AWS WAF | Cloud (AWS-native) | ~$5/month + $0.60/million requests | Deep AWS integration, managed rule groups |
| Imperva WAF | Cloud / On-premises | Contact vendor | Advanced bot protection, API security |
| Barracuda WAF | Appliance / Cloud | Contact vendor | Compliance reporting, SSL inspection |
| ModSecurity + CRS | On-premises (NGINX) | Free | Full customization, no data leaving your network |
WAF deployment note: A WAF is a complementary control, not a replacement for secure application development. WAFs catch exploitation attempts against known vulnerability classes, but they do not fix insecure code, poor authentication, or broken access control in your application. Defense in depth requires both.
Section 7: Complete Production-Ready nginx.conf
The following is a consolidated, production-ready NGINX configuration incorporating all controls from this guide. Adapt domain names, IP ranges, and application-specific settings for your environment.
user nginx;
worker_processes auto;
worker_rlimit_nofile 65535;
pid /var/run/nginx.pid;

events {
    worker_connections 4096;
    multi_accept on;
    use epoll;
}

http {
    # --- Basic Security ---
    server_tokens off;
    more_clear_headers Server;
    add_header X-Frame-Options "SAMEORIGIN";
    add_header X-Content-Type-Options "nosniff";

    # --- MIME Types ---
    include /etc/nginx/mime.types;
    default_type application/octet-stream;

    # --- SSL Global Settings ---
    ssl_protocols TLSv1.2 TLSv1.3;
    ssl_ciphers 'ECDHE-ECDSA-AES256-GCM-SHA384:ECDHE-RSA-AES256-GCM-SHA384:ECDHE-ECDSA-CHACHA20-POLY1305:ECDHE-RSA-CHACHA20-POLY1305';
    ssl_prefer_server_ciphers off;
    ssl_dhparam /etc/nginx/ssl/dhparam.pem;
    ssl_session_cache shared:SSL:10m;
    ssl_session_timeout 1d;
    ssl_session_tickets off;
    ssl_stapling on;
    ssl_stapling_verify on;
    resolver 1.1.1.1 8.8.8.8 valid=300s;

    # --- Timeouts ---
    keepalive_timeout 10;
    send_timeout 10;
    client_header_timeout 10;
    client_body_timeout 10;
    reset_timedout_connection on;

    # --- Request Limits ---
    client_max_body_size 10m;
    client_body_buffer_size 128k;
    client_header_buffer_size 1k;
    large_client_header_buffers 4 8k;

    # --- Rate Limiting Zones ---
    limit_req_zone $binary_remote_addr zone=general:10m rate=10r/s;
    limit_req_zone $binary_remote_addr zone=auth:10m rate=1r/s;
    limit_conn_zone $binary_remote_addr zone=connlimit:10m;
    limit_req_status 429;
    limit_conn_status 429;

    # --- Real IP (Cloudflare example) ---
    set_real_ip_from 103.21.244.0/22;
    set_real_ip_from 141.101.64.0/18;
    real_ip_header X-Forwarded-For;
    real_ip_recursive on;

    # --- Logging ---
    log_format security_detailed '$remote_addr - $remote_user [$time_local] '
        '"$request" $status $body_bytes_sent '
        '"$http_referer" "$http_user_agent" '
        '$request_time "$http_x_forwarded_for" '
        '$ssl_protocol $ssl_cipher';

    access_log /var/log/nginx/access.log security_detailed;
    error_log /var/log/nginx/error.log info;

    # --- Default: Reject Unknown Hosts ---
    server {
        listen 80 default_server;
        listen 443 ssl default_server;
        ssl_certificate /etc/nginx/ssl/default.crt;
        ssl_certificate_key /etc/nginx/ssl/default.key;
        server_name _;
        return 444;
    }

    # --- HTTP to HTTPS Redirect ---
    server {
        listen 80;
        server_name example.com www.example.com;
        return 301 https://$host$request_uri;
    }

    # --- Main HTTPS Server ---
    server {
        listen 443 ssl;
        listen 443 quic reuseport;
        server_name example.com www.example.com;

        ssl_certificate /etc/nginx/ssl/fullchain.pem;
        ssl_certificate_key /etc/nginx/ssl/privkey.pem;
        ssl_trusted_certificate /etc/nginx/ssl/chain.pem;

        # --- Security Headers ---
        add_header Strict-Transport-Security "max-age=31536000; includeSubDomains; preload" always;
        add_header X-Content-Type-Options "nosniff" always;
        add_header X-Frame-Options "SAMEORIGIN" always;
        add_header X-XSS-Protection "1; mode=block" always;
        add_header Referrer-Policy "strict-origin-when-cross-origin" always;
        add_header Permissions-Policy "geolocation=(), microphone=(), camera=()" always;
        add_header Alt-Svc 'h3=":443"; ma=86400';

        # --- Block Hidden Files ---
        location ~ /\. {
            deny all;
            access_log off;
            log_not_found off;
        }

        # --- Restrict HTTP Methods ---
        if ($request_method !~ ^(GET|HEAD|POST)$) {
            return 405;
        }

        # --- Rate Limiting ---
        limit_req zone=general burst=20 nodelay;
        limit_conn connlimit 20;

        # --- Proxy to Backend ---
        location / {
            proxy_pass http://127.0.0.1:8000;
            proxy_http_version 1.1;
            proxy_set_header Host $host;
            proxy_set_header X-Real-IP $remote_addr;
            proxy_set_header X-Forwarded-For $proxy_add_x_forwarded_for;
            proxy_set_header X-Forwarded-Proto $scheme;
            proxy_hide_header X-Powered-By;
            proxy_hide_header Server;
        }
    }
}
Section 8: Validation — Testing Your Hardened NGINX
A hardened configuration that has never been tested is an untested configuration. Run these checks after every deployment and configuration change.
Test TLS configuration (target: A+ rating):
# Qualys SSL Labs API
curl "https://api.ssllabs.com/api/v3/analyze?host=example.com&all=done" | python3 -m json.tool

# Local test with testssl.sh (no external dependency)
bash testssl.sh --full example.com
Test security headers:
curl -I https://example.com | grep -E "(Strict|Content-Security|X-Content|X-Frame|Referrer)"Test information disclosure:
curl -I https://example.com | grep -i server
# Should return nothing or a non-identifying value
Test rate limiting:
# Send 50 rapid requests — should start receiving 429 after the burst limit
for i in {1..50}; do curl -s -o /dev/null -w "%{http_code}\n" https://example.com/; done
Validate CIS compliance with OpenSCAP:
sudo apt install openscap-scanner
oscap xccdf eval --profile xccdf_org.ssgproject.content_profile_cis \
    --results scan-results.xml \
    /usr/share/xml/scap/ssg/content/ssg-ubuntu2204-ds.xml
Compliance Mapping
This guide’s controls directly support the following compliance and security frameworks:
| Control Area | PCI DSS 4.0 | SOC 2 Type II | HIPAA | ISO 27001 | GDPR |
|---|---|---|---|---|---|
| TLS 1.2+ / disable weak ciphers | Req. 4.2.1 | CC6.7 | §164.312(e) | A.10.1 | Art. 32 |
| HTTPS redirect / HSTS | Req. 4.2.1 | CC6.7 | §164.312(e) | A.10.1 | Art. 32 |
| Access logging / SIEM | Req. 10.2 | CC7.2 | §164.312(b) | A.12.4 | Art. 33 |
| Rate limiting / DDoS controls | Req. 6.4 | CC7.1 | §164.308(a)(1) | A.13.1 | Art. 32 |
| Service account lockdown | Req. 7.2 | CC6.1 | §164.312(a) | A.9.2 | Art. 32 |
| Security headers / CSP | Req. 6.4 | CC6.8 | §164.312(c) | A.14.1 | Art. 25 |
| WAF deployment | Req. 6.4 | CC6.8 | §164.312(c) | A.14.2 | Art. 32 |
FAQ
Does implementing all these controls affect NGINX performance?
Most controls have zero measurable performance impact: disabling server tokens, setting permissions, restricting HTTP methods, and configuring security headers add no latency. Rate limiting and connection limits add marginal overhead only when limits are actually being triggered. OCSP stapling and SSL session caching improve performance. TLS 1.3 reduces handshake latency compared to TLS 1.2. A fully hardened NGINX is typically faster than a default installation due to proper connection management.
How do I handle NGINX hardening in a Docker or Kubernetes environment?
Container deployments require all the same controls, plus additional considerations: use a non-root base image (the official NGINX image uses root by default — use nginxinc/nginx-unprivileged instead), mount TLS certificates as Kubernetes secrets, enforce network policies to restrict pod-to-pod communication, and use a sidecar WAF (like ModSecurity as a sidecar container) if you cannot modify the NGINX image. Scan your NGINX container image with Trivy or Snyk before deployment.
How does NGINX hardening integrate with Cloudflare or a CDN?
Cloudflare and other CDNs terminate TLS at the edge, so your NGINX server receives decrypted traffic from the CDN’s edge nodes. You should still enforce TLS between NGINX and the CDN (using Cloudflare’s “Full (Strict)” SSL mode with an origin certificate). Combine CDN-level DDoS protection and WAF with NGINX-level rate limiting and security controls. Use the set_real_ip_from directive to restore real client IPs from Cloudflare’s forwarding headers — otherwise your rate limiting will throttle Cloudflare’s edge IPs rather than actual users.
What tools should I use to continuously monitor NGINX hardening compliance?
Wazuh with the NGINX SCA policy provides free, continuous compliance monitoring against CIS Benchmarks, alerting on configuration drift. For vulnerability scanning, OpenSCAP is free and framework-aligned. Qualys and Tenable Nessus offer commercial scanning with NGINX-specific plugins. For TLS certificate monitoring and expiry alerts, use Certbot’s built-in renewal timer for Let’s Encrypt, or a certificate monitoring service like Cert Expiry Monitor. Integrate all findings into your SIEM for centralized alerting and incident response.